First thing to understand is that going out into a storm to photograph any part of it can be dangerous. Lightning is particularly dangerous. It has not set pattern nor does it care if you are what you think is a save distance away.
With that said let’s get to the actual techniques. Notice I said techniques. There is more than one way to photograph lightning. For the beginner the easiest to to try to stay in a shelter or under a roof and shoot out from it. I strongly suggest a tripod as very few good shots of lightning have been done by a quick finger. I personally have never seen one or did it except by accident one time when I was photographing the clouds.
Whatever camera you decide to use I hope it has a bulb setting or at least a shutter time of 20 seconds or more. A cable release is an excellent thing to use if your camera takes one. Some of the new cameras do not but some have the ability to use an electronic release. You will need to check your camera manual for that information.
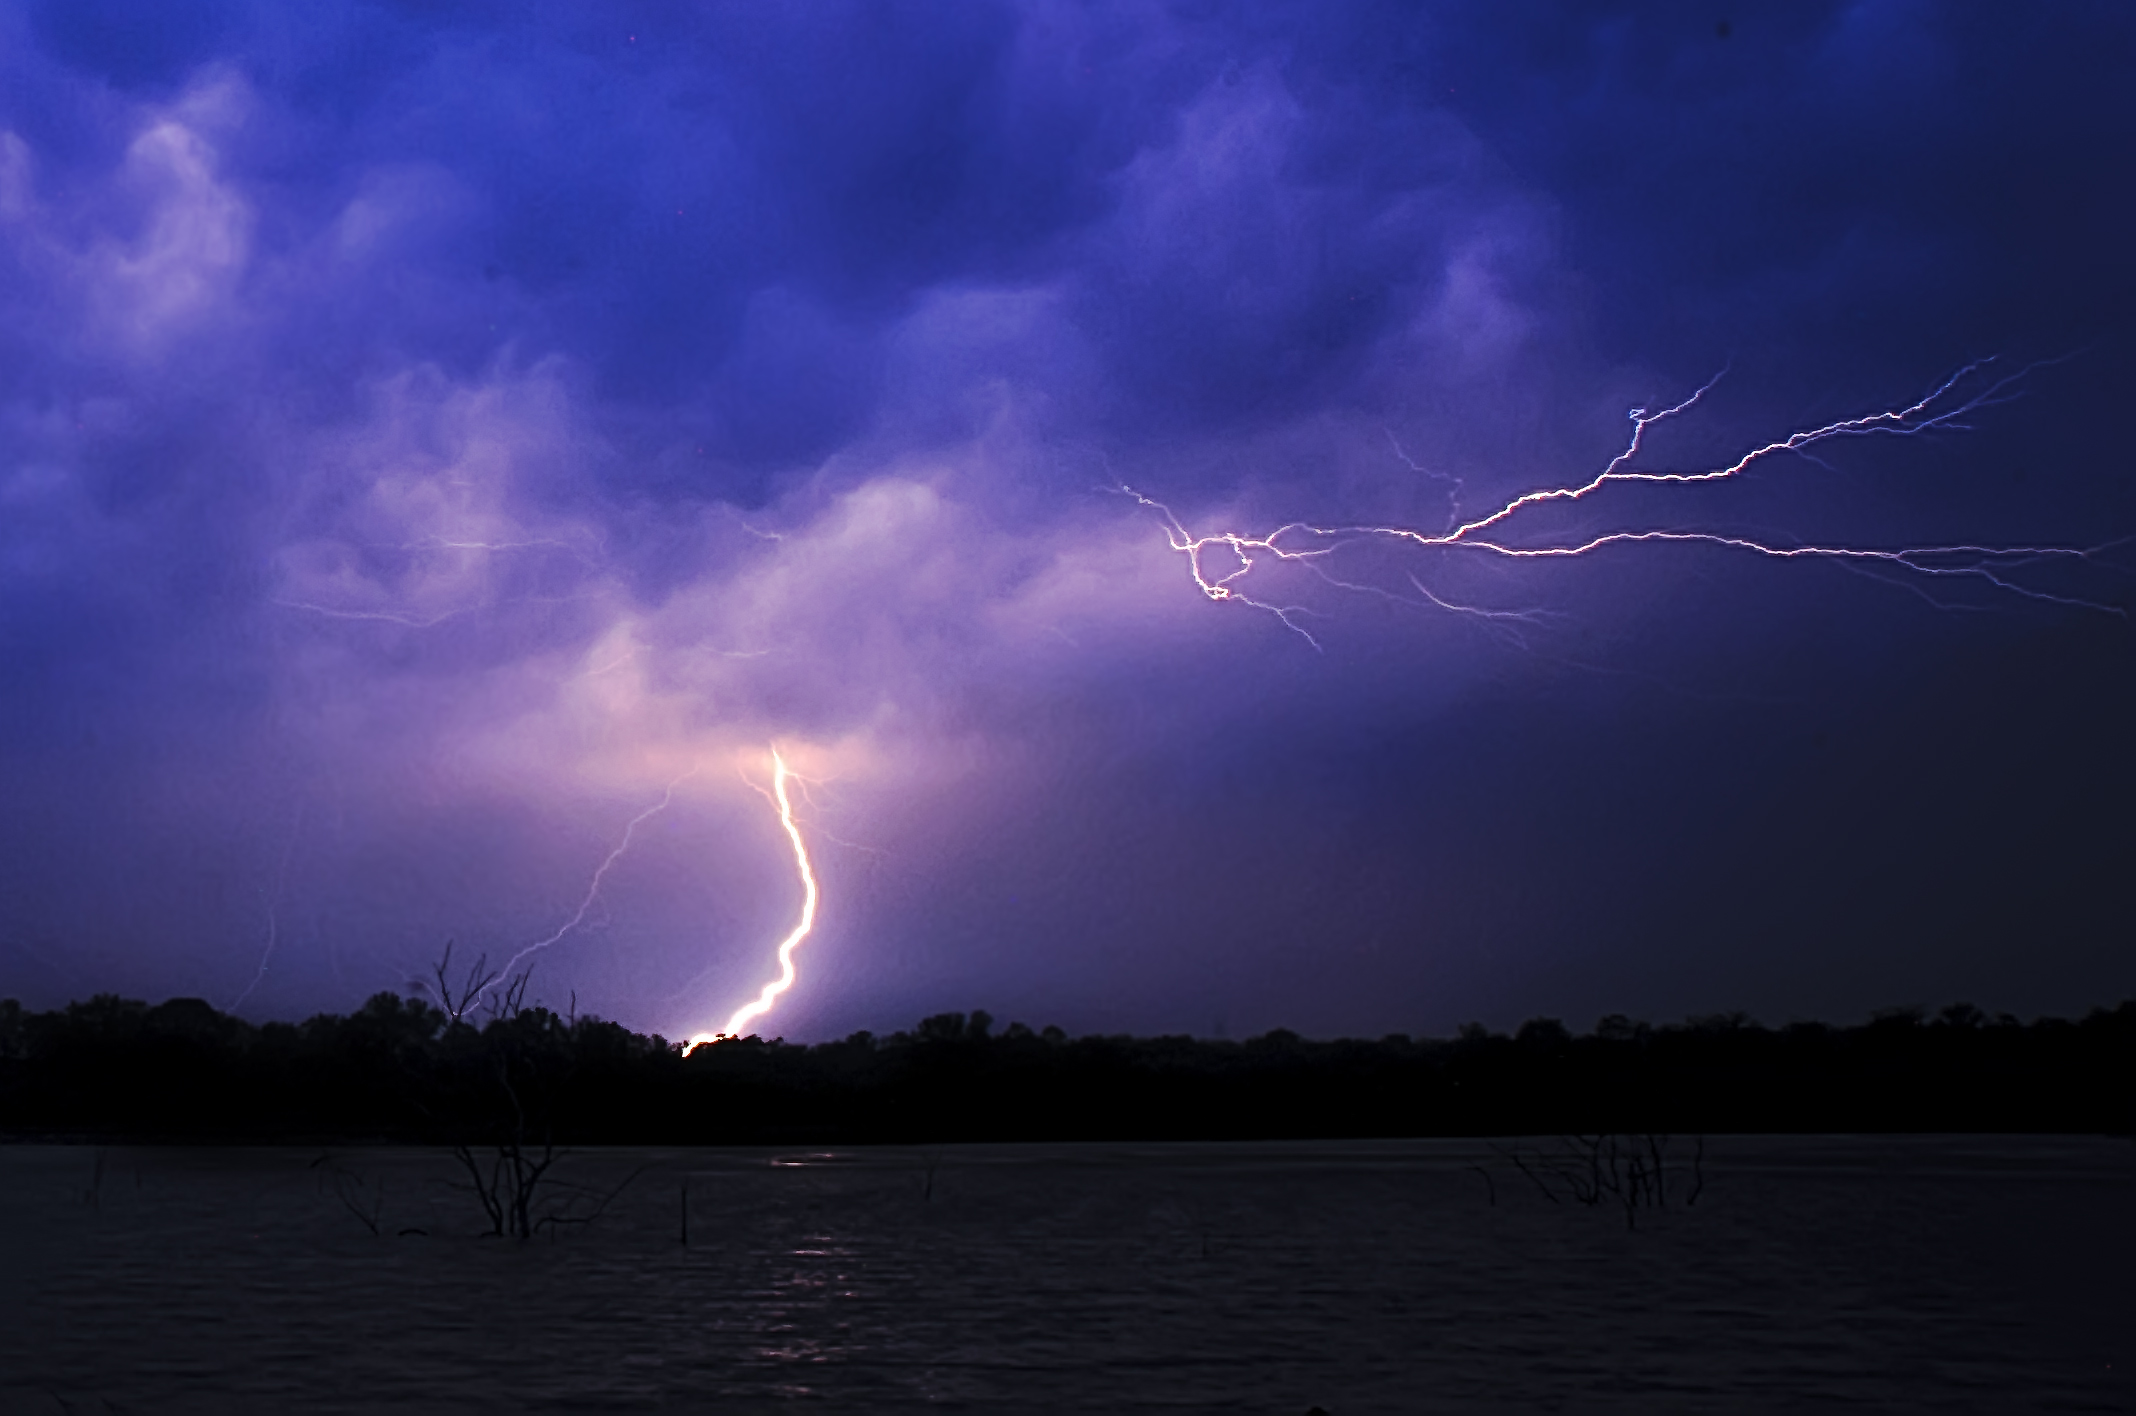
The first image is of a spectacular lightning show that was all one group. It was a center strike with others going out in various direction almost in a circular pattern. The color is because it was right after the dark had started to settle. The properties on this shot: Nikon D700, 24mm Nikon, F/20, 20 second exposure using a cable release and a tripod. I had the cable release locked and the camera set to shoot 20 second exposures.
The next image is one that took three sets of lightning to get. Again the same camera and lens with a tripod and cable release. It was different day. 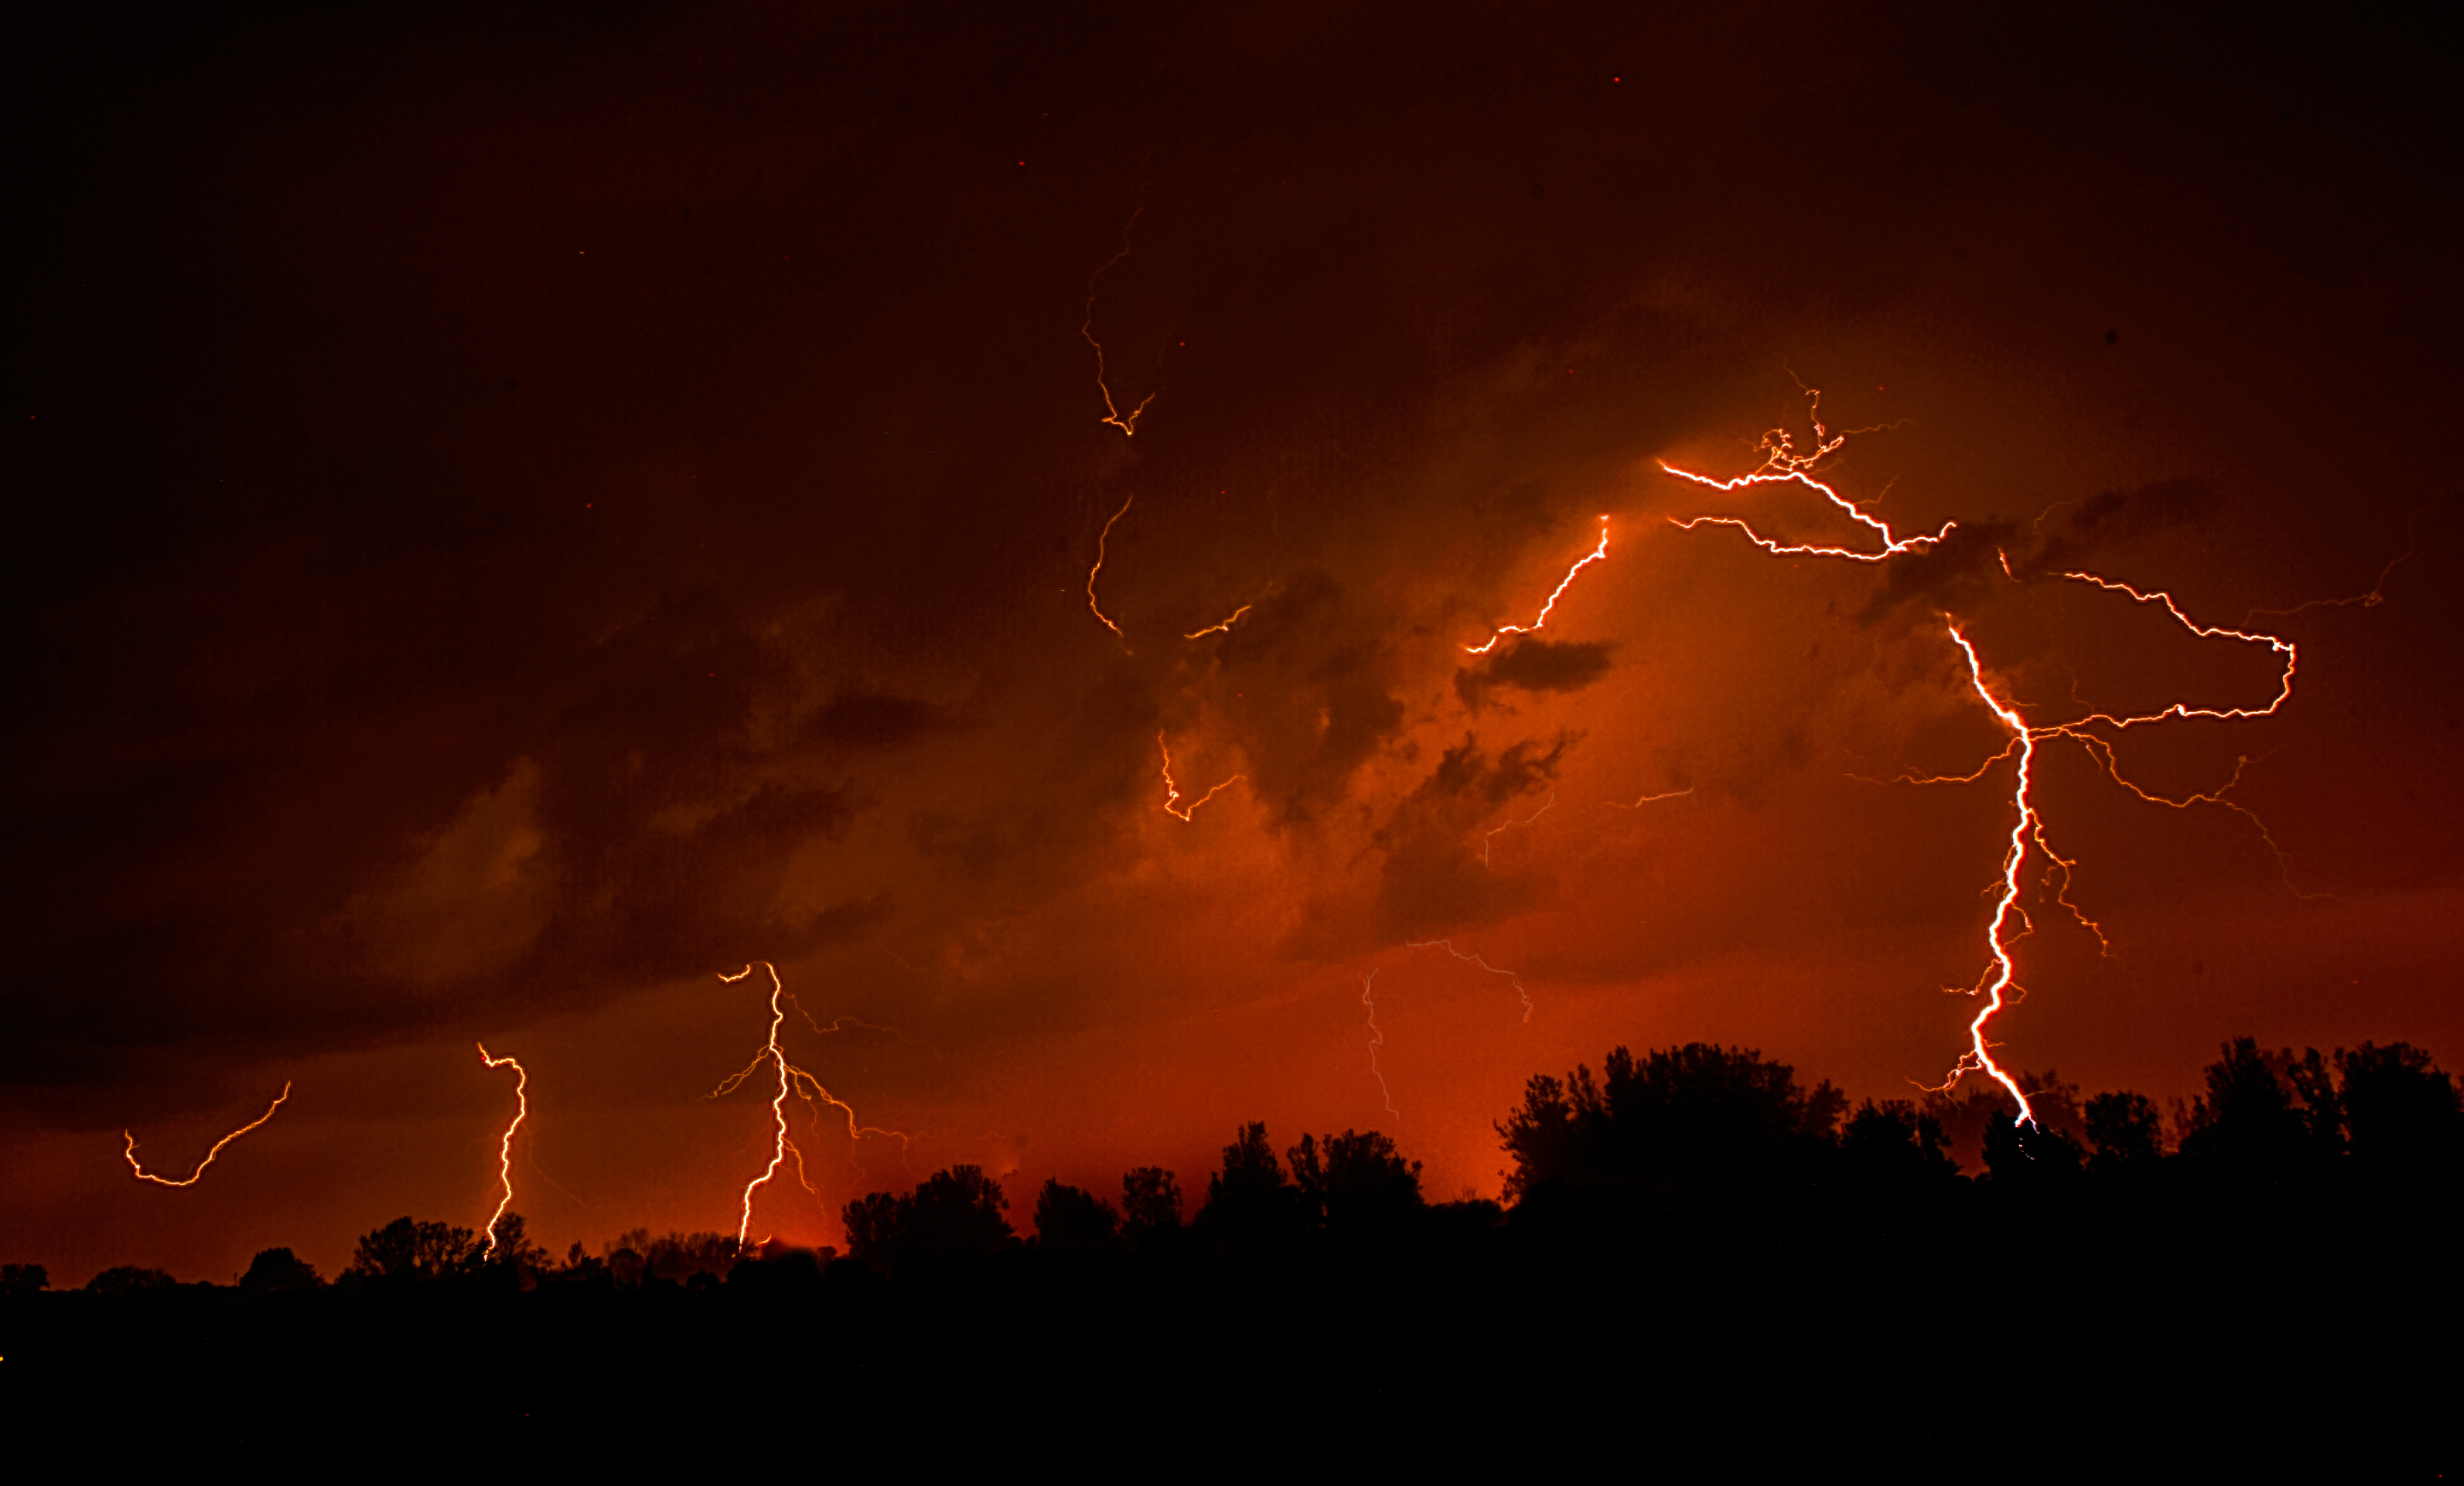
The images was shot at F/20, 20s exposure ISO 400. Both shot on Manual with the lens focused at infinity using the back button focus method. It is not necessary to do that. You can focus the lens even using AF then just shot off the auto focus on the lens and it will stay focused where you set it.
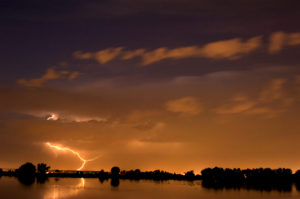
This image shot in just north of Denver Colorado was shot trying to get the reflection in the water. It was shot with a Nikon D700, Nikon 50mm, 30s exposure.
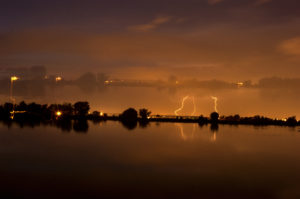
As you can see the common thread is for the exposure to be long enough for lightning to appear but not long enough for the images to turn out way overexposed. That is where you the photographer comes into play. I have hundreds of lightning shots that all look different. The higher the exposure or ISO the brighter the lightning will be. That is not always a good thing. If you are close and it is a strong bolt of lightning it can blow out the streak to be almost unusable. You can also play around by shaking or moving the tripod to get effects like this image. Notice the second line of trees about the ones on the lake. You will also note they do not match the bottoms. There is also not duplication of the lightning
 The last image shows lightning of two different colors. Lightning does come in different light wave lengths. It is not rare but one very seldom actually notices. However the camera does notice.
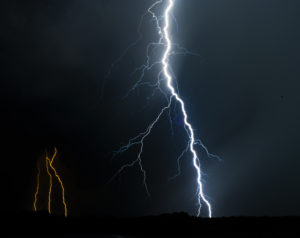
This shot was taken off my sister’s covered porch. The others were taken out in the open during storms.
It was shot with the D700, 50mm lens, 16s exposure, F/22 and ISO 800 with a Nikon cable release and a Manfrotto tripod.
I hope you get out and enjoy the world of storm photography. It is very rewarding but you must understand that it can be dangerous. Things fly in the air with the high winds. You need to know how to set up your equipment to avoid it being damaged or blown over by high wind. One tip, always have a leg of the tripod pointing the same way the camera lens does. It will help keep the tripod from being blown over. I always make sure the legs are well spread apart and solid on the ground. My tripod has spikes on the leg bottoms under the rubber feet. When wind is involved or just dirt I always expose the spikes to help hold the tripod solid.
Good Luck and have fun.